I first had this dish when I took the Dutch Oven Cooking class from from Kent Mayberry through the Canyons School District continuing education. Kent was 1999 World Dutch Oven Cookoff champion. If you’re new to dutch oven cooking, I highly recommend his class. I liked it so much that I took it twice. He teaches how you can have great foods from the very simple to the incredibly complex.
Below is my rough adaptation of the recipe for Zac’s birthday dinner. For the award winning version, I recommend Kent’s cookbook, American West Dutch Oven Cooking. The stuffing recipe is the bomb! And sometime I need to try the Crown Roast recipe!
Ingredients:
1/2 cube butter
1 spoonful minced garlic (I used bottled garlic)
1 1/2 onions, sliced into rings
white mushrooms – 1 large package
brown mushrooms – 1 large package
better than boullion – beef flavor – 1-2 large spoonfuls
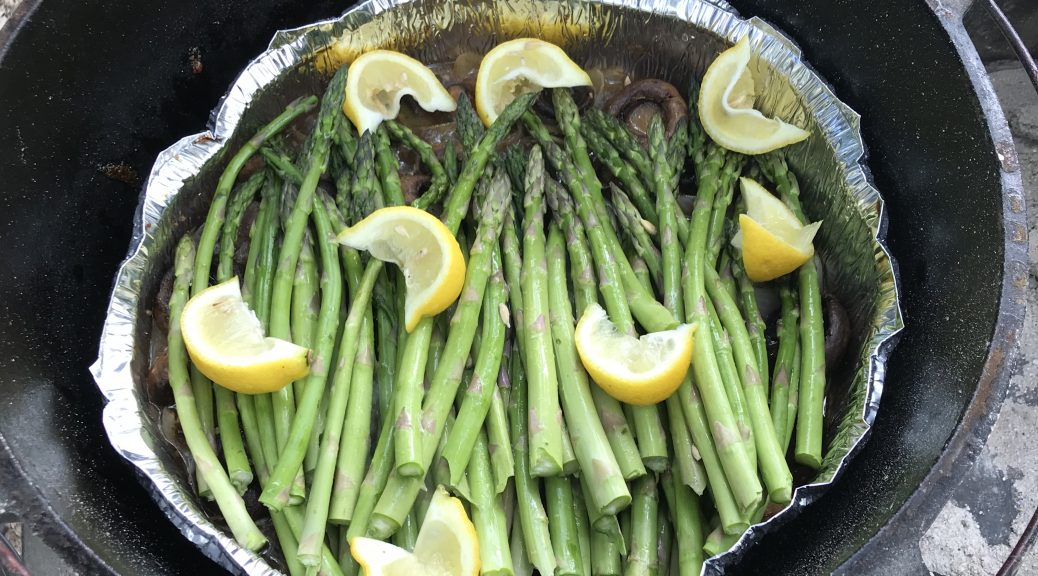
1 package of asparagus (mine was a Costco package, so probably equivalent to about 2 grocery store bundles.)
1 lemon
For this dinner I used my “Big Bertha” dutch oven. It’s a 15 in. deep-style and weighs in at 33 lbs. empty.
I also used a dutch oven liner for easier cleanup. It was smaller than Bertha, so I just pressed it down into the pan and flattened it out a bit so the bottom of the liner fit the size of the dutch oven.
Food Preparation:
Remove all the stems from the mushrooms, and place the stems in one bowl, and the caps in another bowl.
To prep the apparatus cut or break off the woody portion.
Cooking:
I began by warming the dutch oven by setting my coals up using the ring method.
Spray the dutch oven liner with non-stick cooking spray.
Add butter, onion and garlic to dutch oven and saute.
Arrange all the mushroom caps on the bottom of the dutch oven, stem-side-up. Mine had enough mushrooms that I needed to add a second layer of caps.
Once you’ve placed all the caps, add the stems on top
Cover and cook to release moisture from the mushrooms (about 8-10 min?)
Add better than bouillon and stir.
Cover and let cook another 10ish minutes.
Recipe Adaptation for Keto:
Normally you would thicken the gravy at this point using a corn starch slurry, but I left that part out to make it more keto friendly.
Add Asparagus
Cover and cook for about 8-10 minutes (reduce heat below and add more heat to the top)
Squeeze lemons onto asparagus
Place the squeezed lemons on the asparagus as a garnish
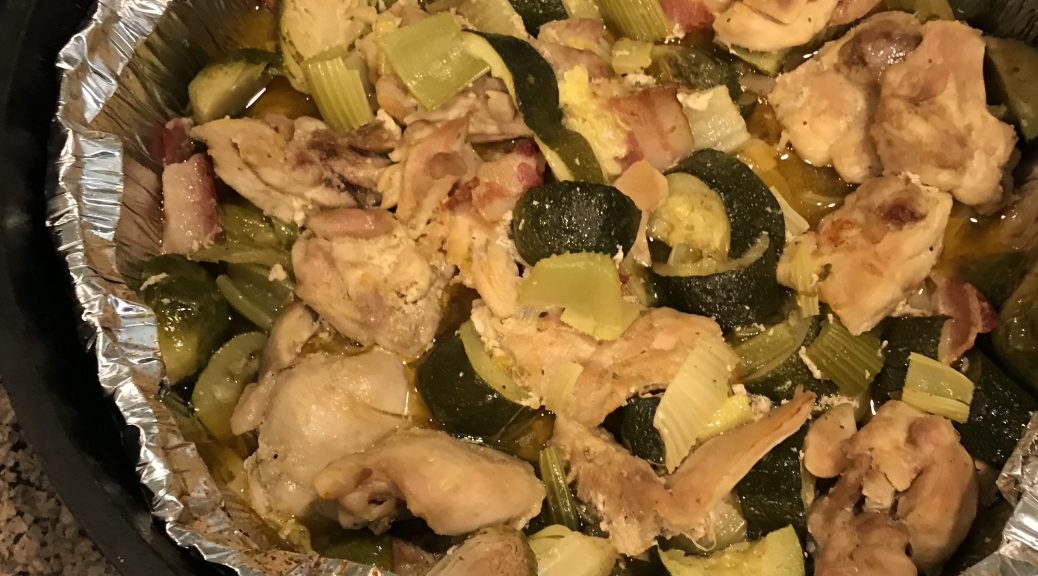
For Zac’s birthday dinner he requested some of his favorite Dutch oven dishes, Chicken Pot Pie, and Mushrooms & Asparagus (a family favorite). Since a couple of us are following the keto way of eating (avoiding carbs), I also made this Chicken, Bacon and Veggies dish to be keto friendly.
(Side note – as I’m writing this, I’m also enjoying some of the leftovers from this dish for my lunch. I topped it with some Creole seasoning, shredded cheese and fresh spinach leaves. Then when I heated it up in the microwave, the spinach leaves wilted down nicely. Then a splash or two of chipotle tabasco sauce and enjoy – it was delicious.)
I also modified the Mushrooms & Asparagus to be keto friendly so we could enjoy them too.
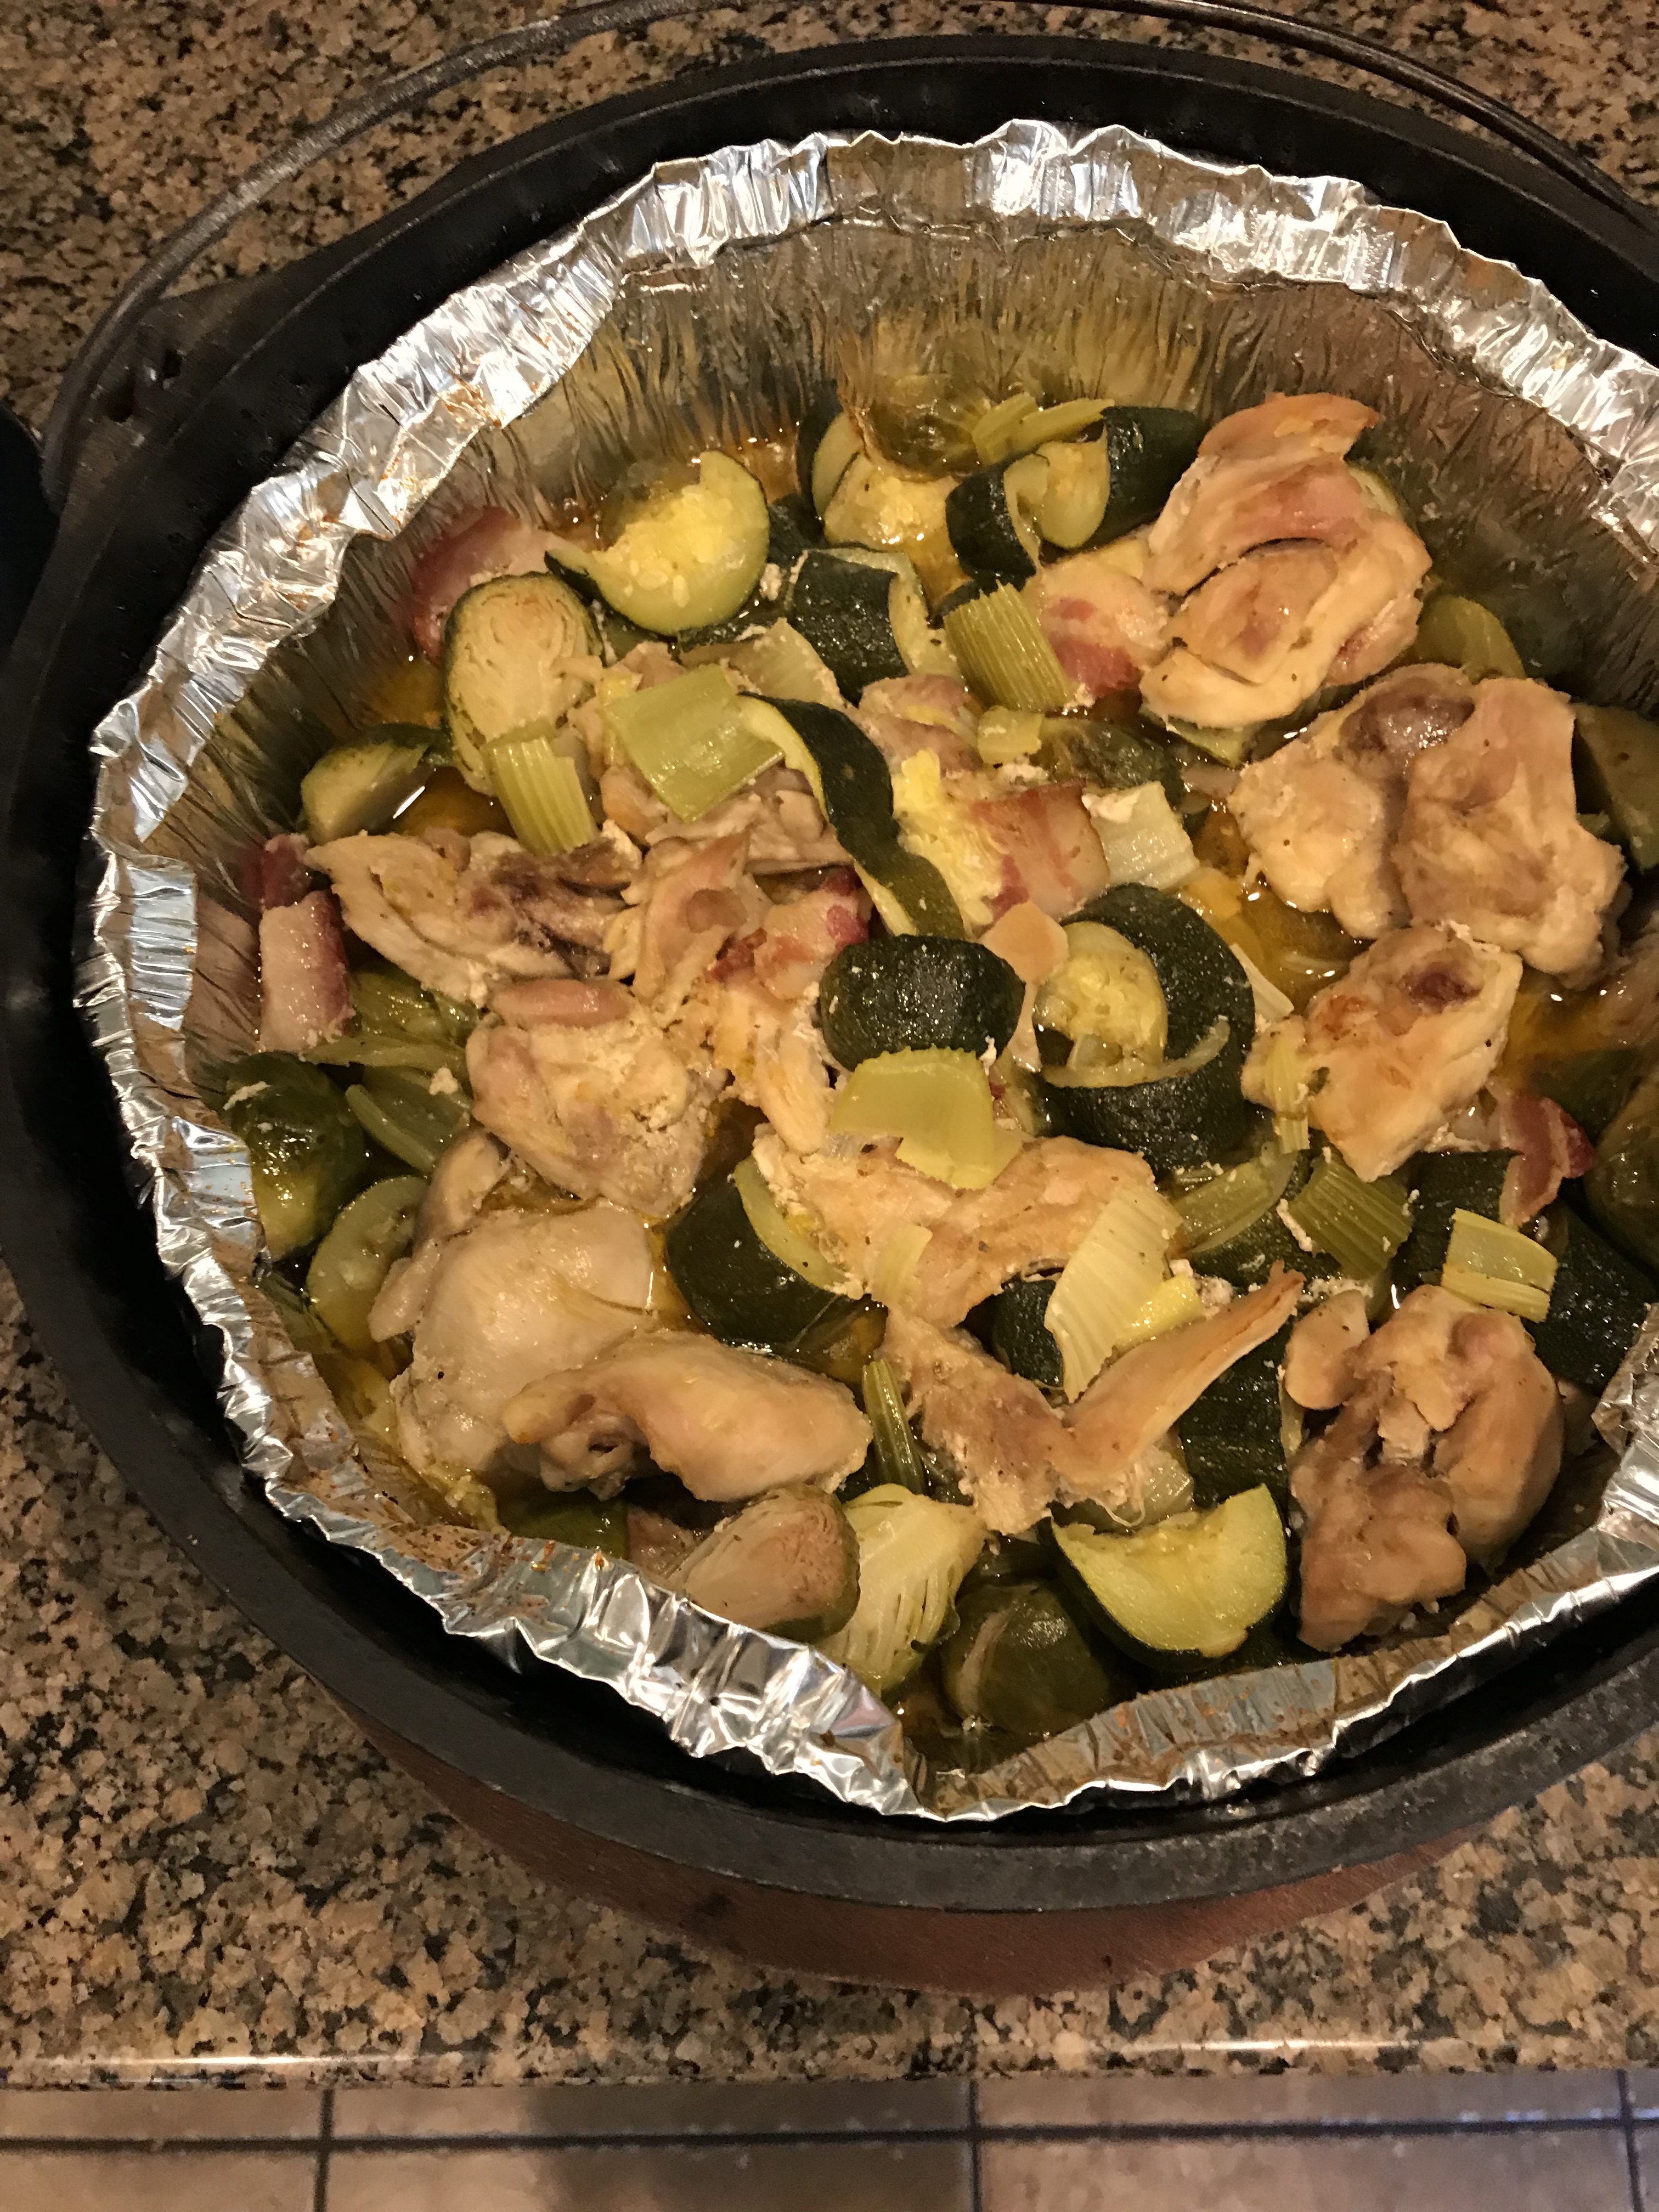
Dutch Oven Chicken Bacon & Veggies
Ingredients:
1 package of bacon cut into 2 in. pieces
1 1/2 to 2 medium onions, diced
2 cups chopped celery
4-6 zucchini (or half zucchini and half yellow squash)
approximately 10-12 brussel sprouts, cut in half
1 bag Costco boneless skinless chicken thighs (thawed and cut in half)
Seasoning salt (Some of my favorites are Creole, Slap Ya’ Mama, or Old Bay. None of these have added sugars)
Spray the DO liner with a non-stick cooking spray.
Bring pot up to heat and add the bacon, onion and celery. Cook until the bacon is most of the way done.
Add the chicken thighs. I cut mine in half so the pieces would cook more evenly (they were still partially frozen) and be more manageably sized.
Cover and cook, stirring occasionally to ensure all the chicken is getting cooked through. Often with chicken dishes I will cook the chicken until I am sure the chicken is completely cooked before I go onto the next step. You don’t want to chance undercooked chicken. And since the next ingredients (zucchini and brussel sprouts) are softer and cook quickly, I didn’t want them to overcook – which they did anyway, but that’s another topic.
I had started out cooking this dish using a 12″ deep style dutch oven. After I added the chicken I noticed that there was no way it would all fit into this pot. And since some of the chicken was still partially frozen, I enlisted another 12″ DO and split the amount of chicken to the two pots to speed up the cooking.
Once the chicken was done, I added in the brussel sprouts and let them cook for about 5 minutes, and then added the zucchini to cook for about 5 minutes. Since these are softer vegetables, they can cook quite quickly.
This would have been ideal to cook the brussel sprouts and zucchini just enough so they were cooked, but not overdone – but my timing of all the dishes wasn’t the best, so the final dish was a bit overcooked, but still tasted great! Plus it was keto friendly, so we could all enjoy. And there was plenty to go around, so even the non-keto eaters could enjoy it.
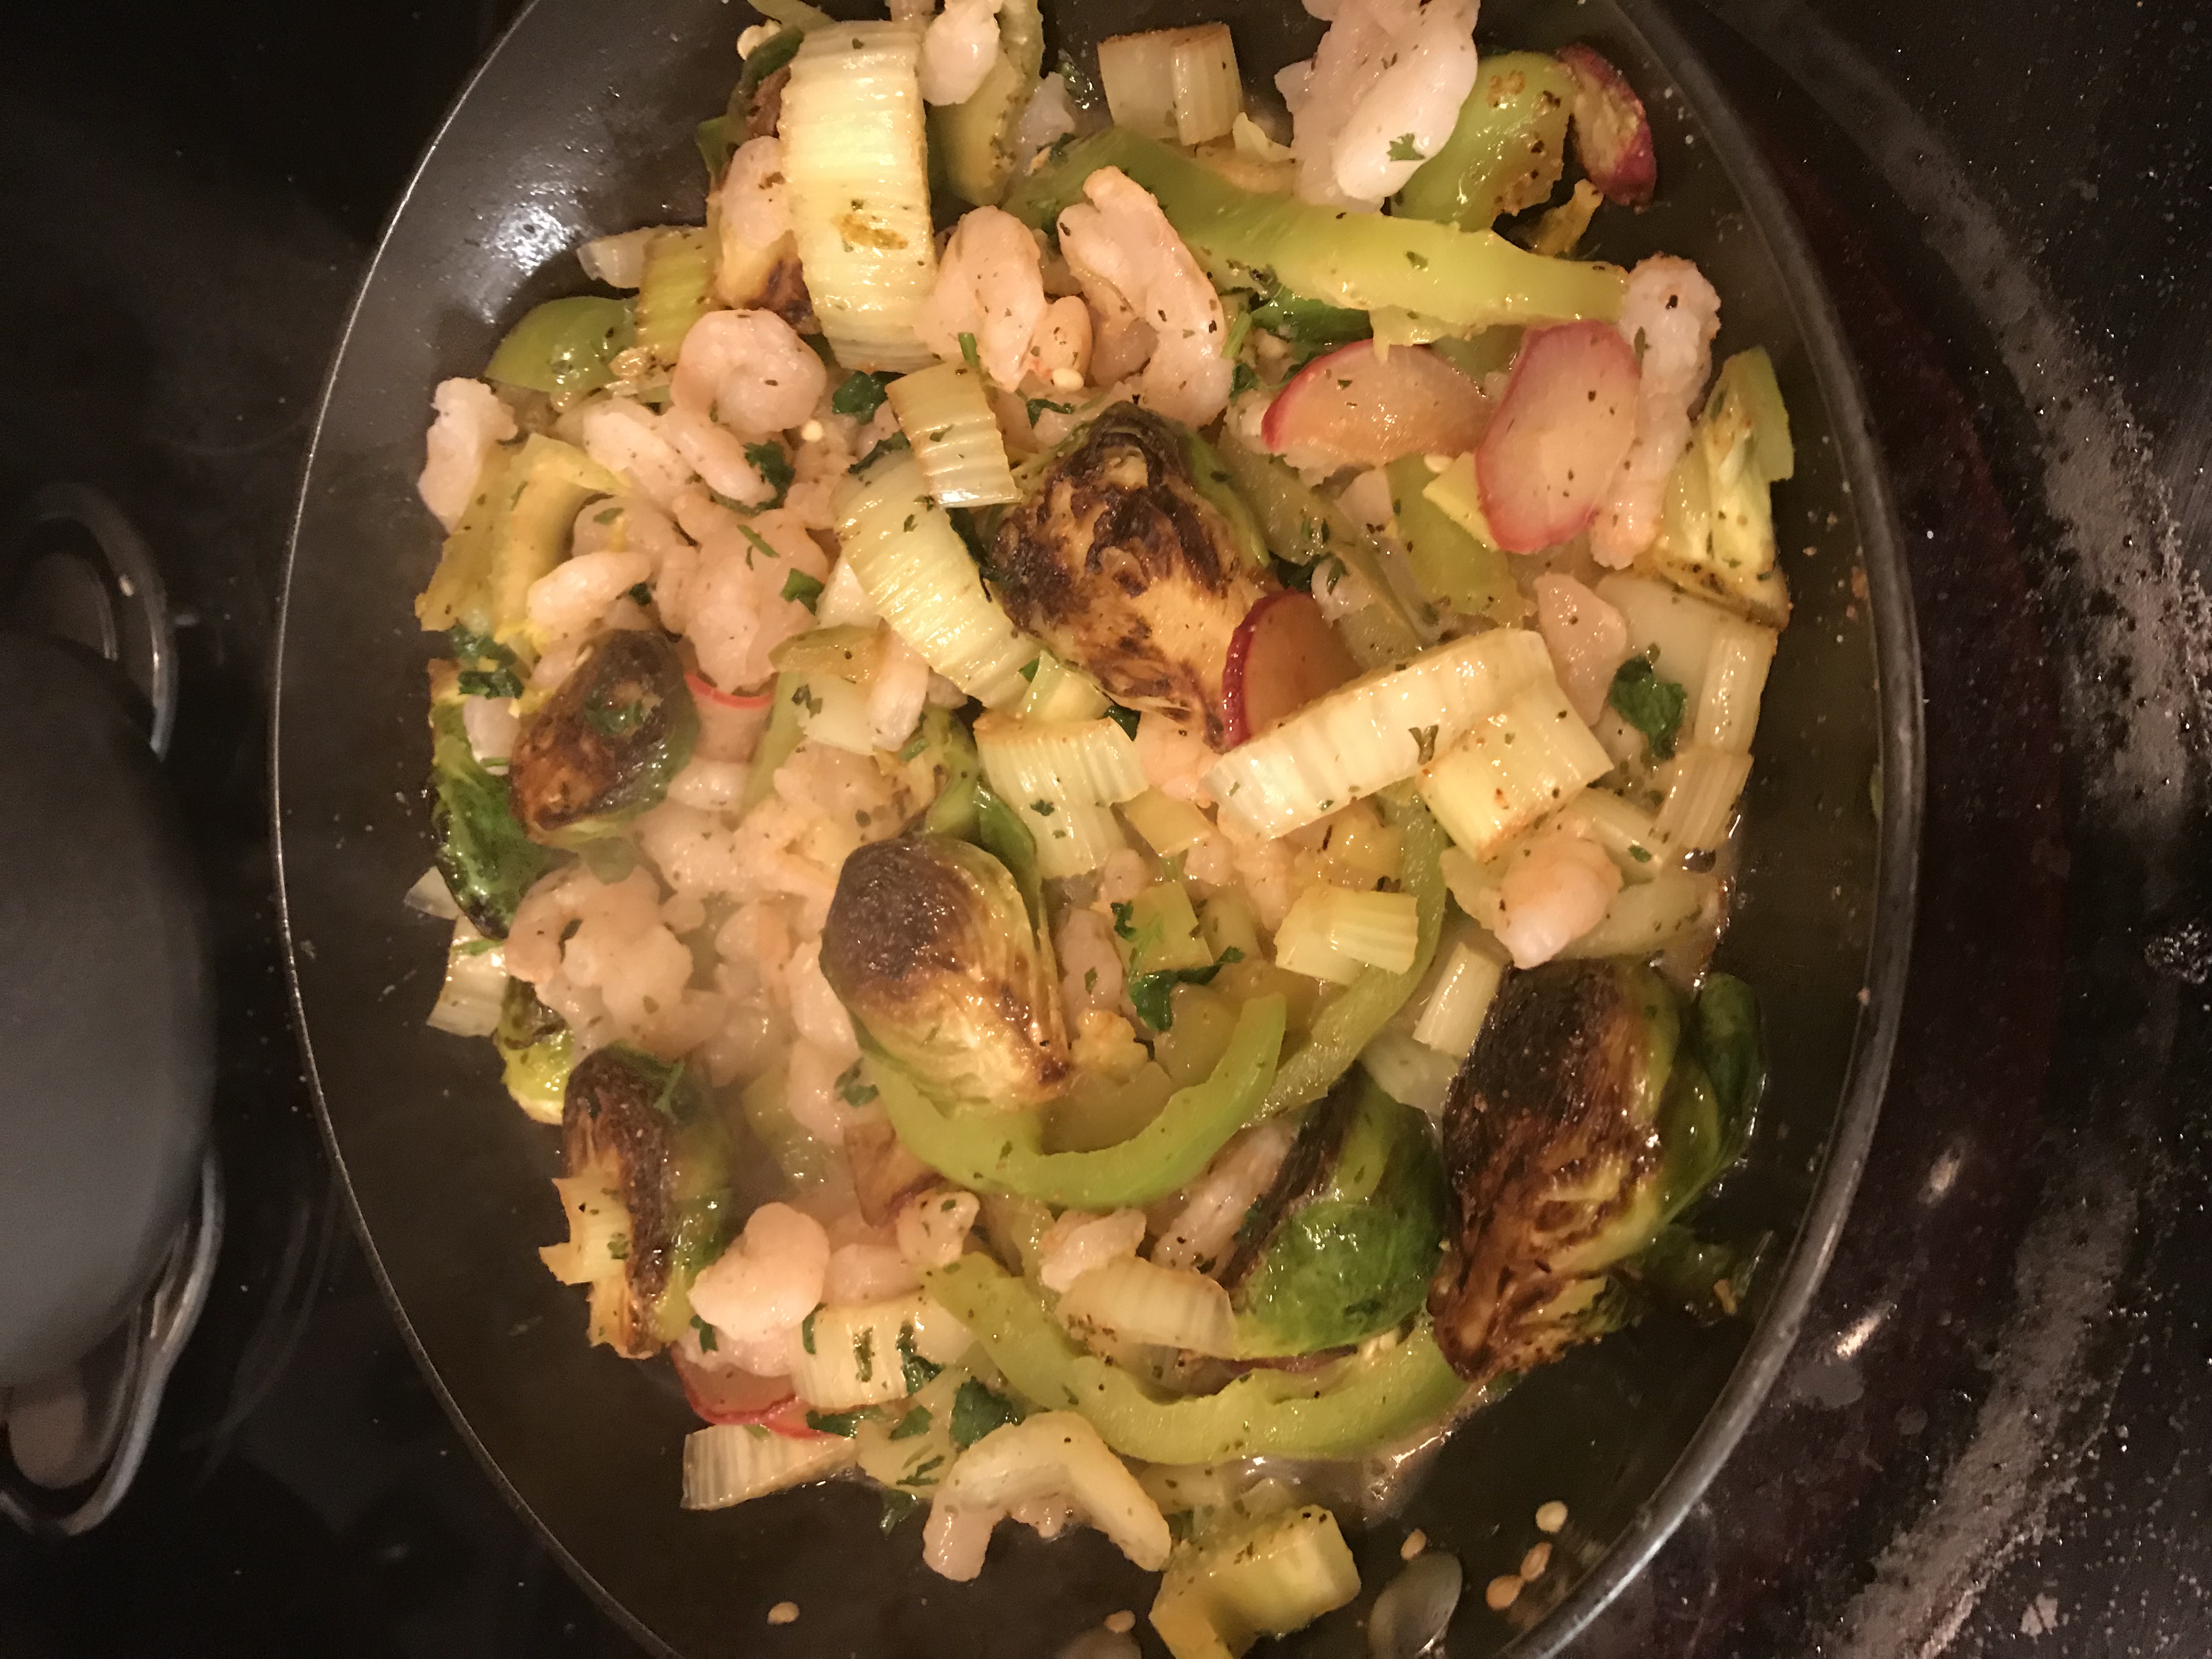
Something else that would have been cool is to sear the flat side of the brussel sprouts in a hot skillet before adding them to the pot – mostly to give a bit of color, but that didn’t happen in this case.
Here’s a picture of another dish where I seared the brussel sprouts, and I really liked the look.
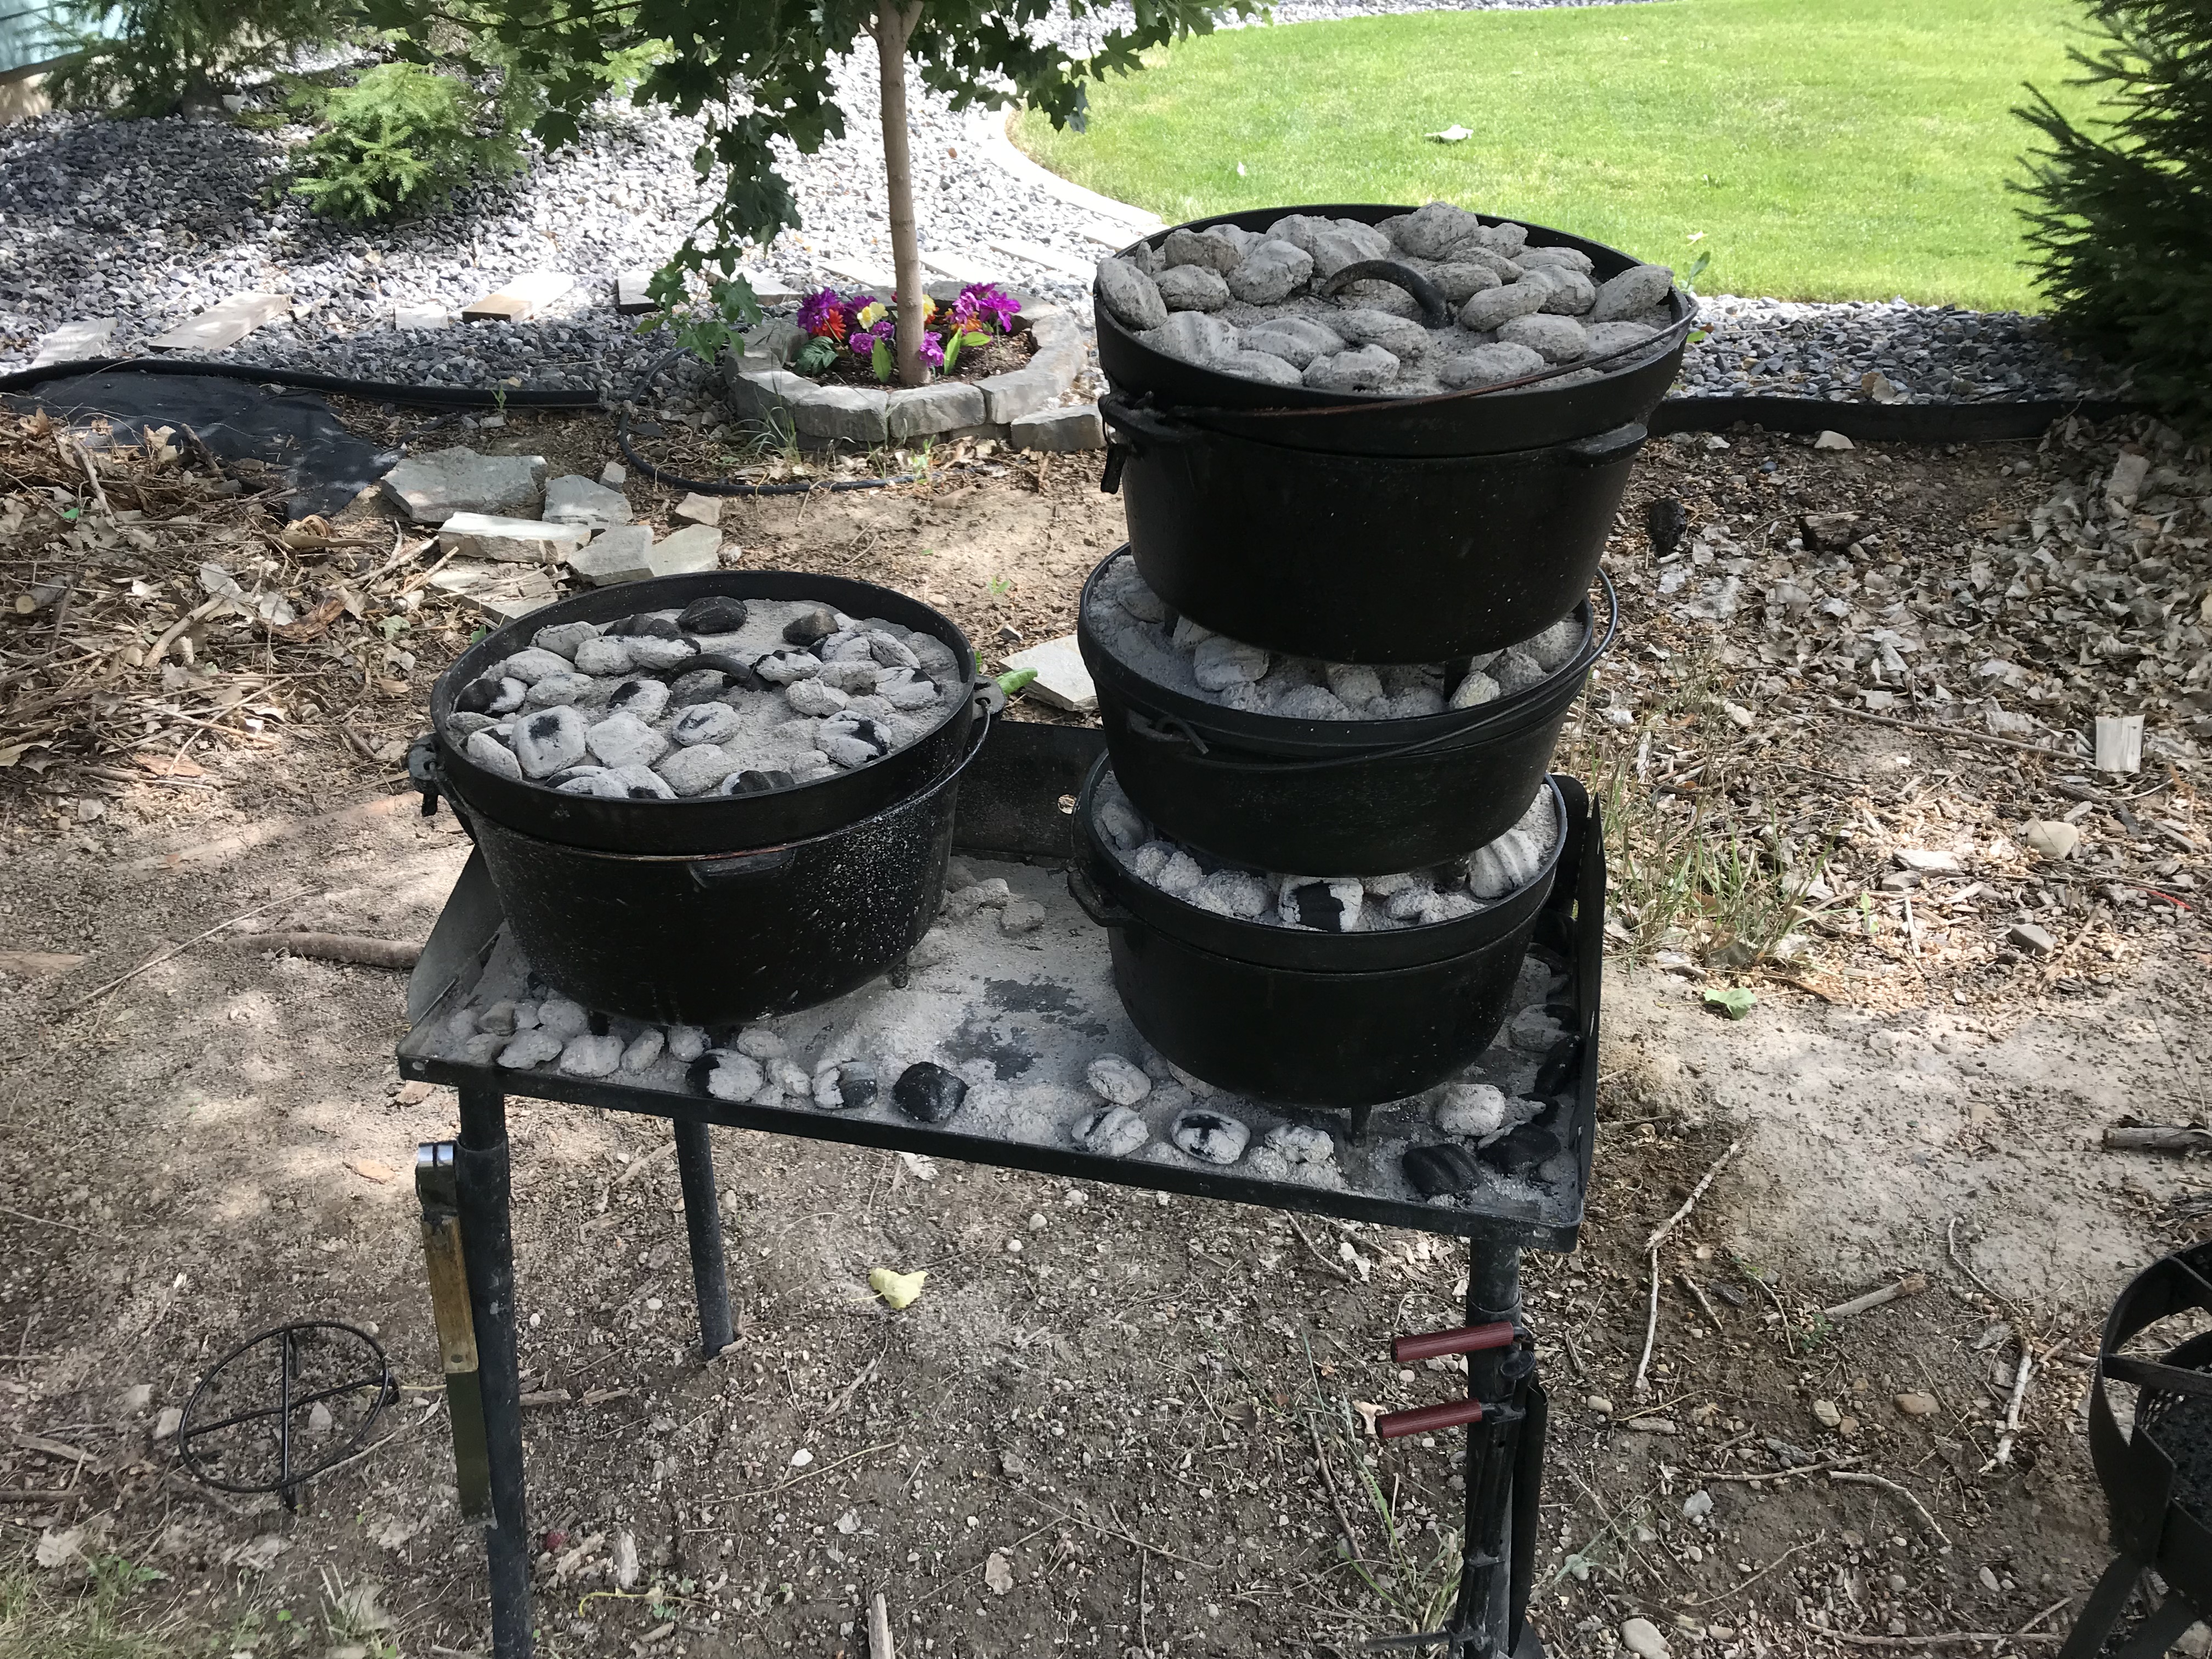
This week has been a stressful week because our daughter and her friend were in a serious accident Wednesday night when another driver ran a red light. So for this dinner I took a few shortcuts to save some time and sanity. Besides, a few shortcuts can be handy when you’re in a time crunch and running 4 dutch ovens at the same time.
As I’ve said before, my style of cooking is more faking it as I go, so here’s an approximation of how I made it this time. I am often combining flavors in my head as I go along, or seeing what ingredients I have on hand, and deciding how they can best go together for a meal.
For this dish I used a 12″ deep-style dutch oven. My apologies to the “DO Purists”, but I’ve become a fan of the Dutch oven liners for making cleanup much quicker and easier.
Dutch Oven Chicken Pot Pie Recipe:
Ingredients:
1/2 cube butter
1-2 spoonfuls of minced garlic (I used bottled)
1 1/2 yellow onions chopped
2 cups chopped celery
1/2 to 3/4 bag of Costco pre-cooked rotisserie chicken (cut into bite-sized chunks). [cheater’s shortcut]
If not using the shortcut, you can use 3-4 chicken breasts or thighs cut into bite sized chunks.
2 large cans Cream of Chicken soup
2 tubes of Buttery Crossoiant Dough
1 roma tomato sliced
1/2 cup fresh parsley
Spray DO liner with non-stick cooking spray.
Melt 1/2 cube butter
Add garlic, onions, and celery and sautee
(NOTE: if you’re not using the cheater’s “pre-cooked chicken shortcut”, you would add the raw chicken cubes and cook it here with the onions, garlic and celery until the chicken is completely cooked through.)
Add pre-cooked rotisserie chicken
Bring everything up to heat
Add 2 small bags of mixed vegetables and 2 large cans of cream of chicken soup
Stir and bring up to heat/low boil. You want the filling to be good and warm to help cook the breading from the bottom. If it isn’t warm enough it might be a bit doughy underneath.
This is the filling for your Chicken Pot Pie
When this is beginning to boil, stir it one last time and then reduce the amount of heat from below to avoid burning the filling.
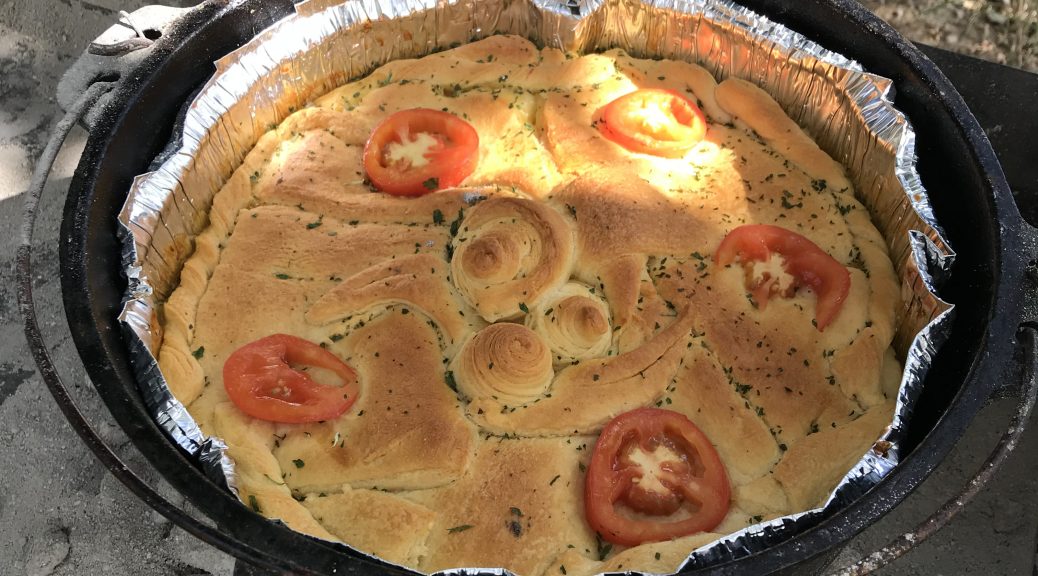
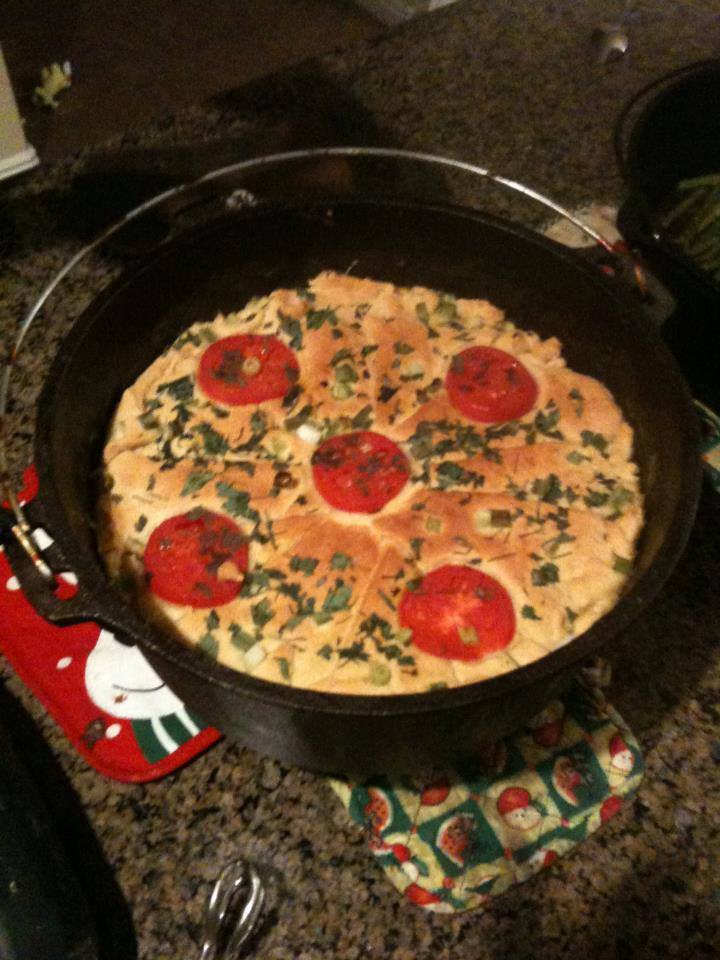
Arrange triangles of croissant dough to cover the top of the filling. If you’re feeling creative you can also add some embellishments like flowers, leaves, or ropes with the extra dough. [on the picture above, you can see that I went for a couple flowers and leaves, and a rope around the edge.] Just remember that parts with multiple layers of dough might not get cooked as consistently.
I usually also add a few tomato slices and fresh parsley as a garnish on top.
Place the lid back on the dutch oven, and place additional coals on the top to focus the cooking top-down onto the breading.
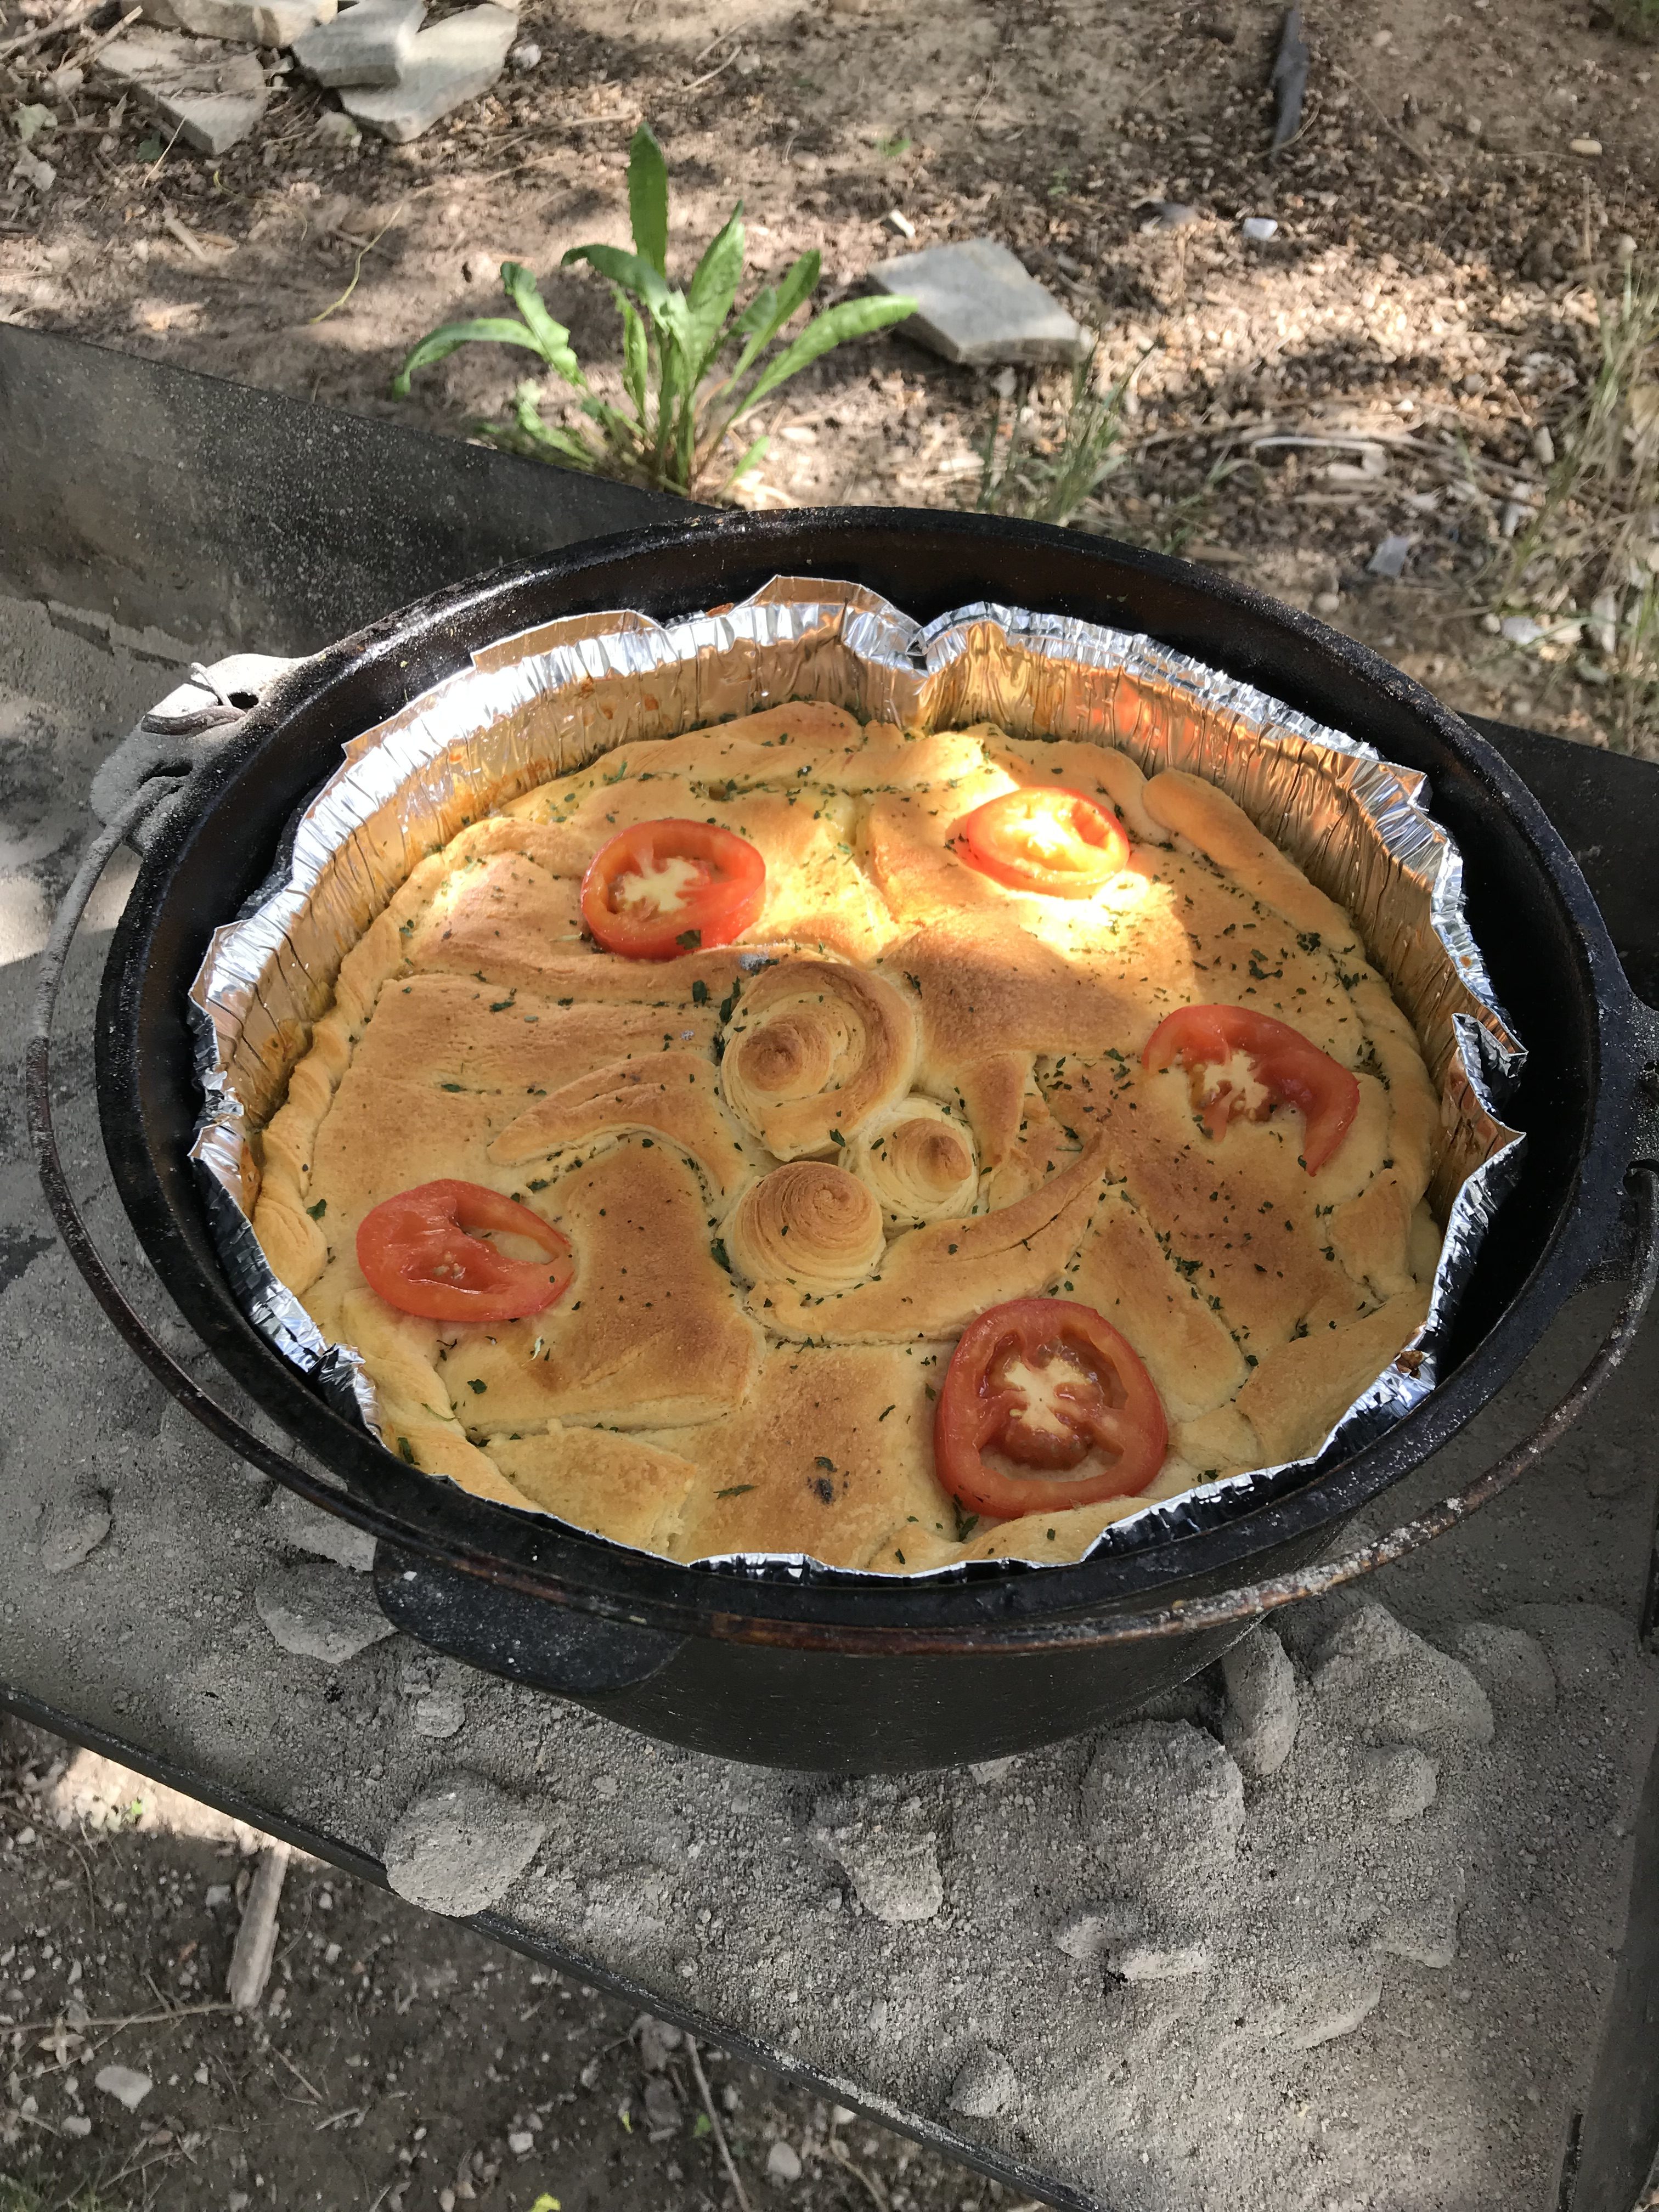
One of my favorite things is that beautiful buttery smell you get when you lift the lid and the bread is just about done. Oh man!
Cook until the breading top of the Chicken Pot Pie is golden brown.
You may want to use either Chinet or at least double-plates or bowls because this can be pretty hot.
Serve and enjoy!
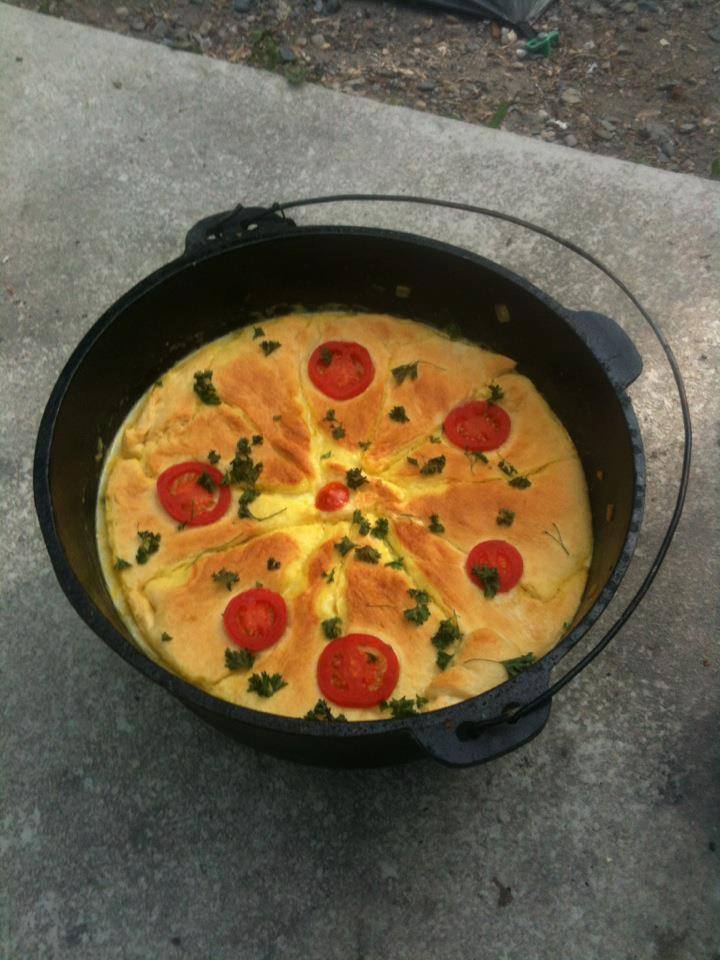
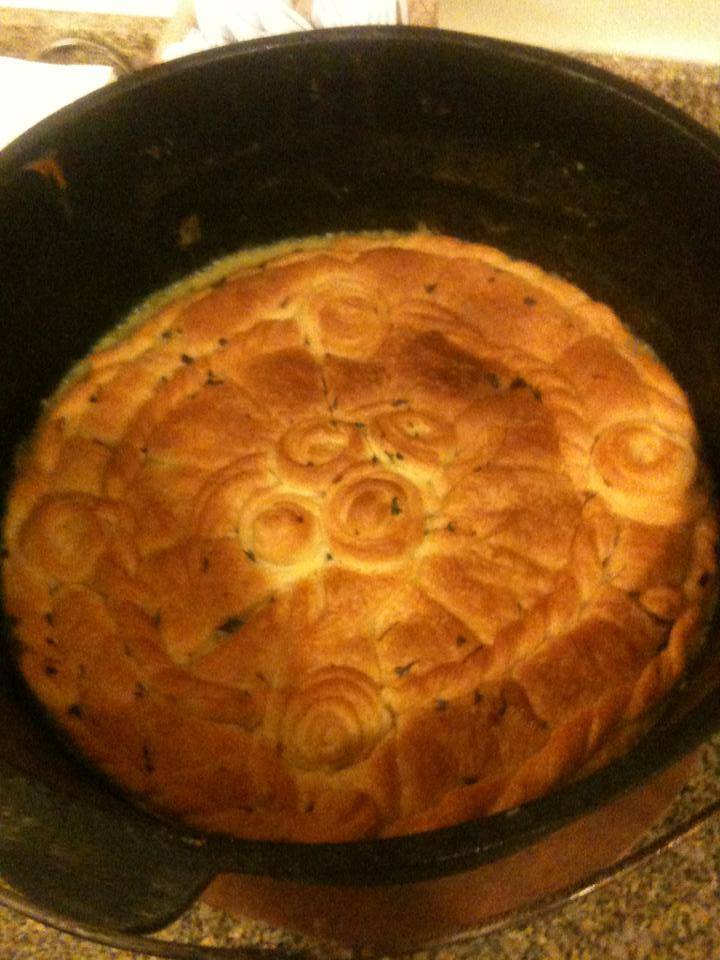
Here are a few other photos from other times I’ve made Chicken Pot Pie:
Don’t tell anyone that I cheat when I make this Dutch Oven Chicken Pot Pie! For the top I use buttery croissant dough from a tube! It’s a delicious little shortcut. I found that the Dutch Oven Chicken Pot Pie was so easy and delicious, that I’ve made it a few different times..
For this one I didn’t have the tomatoes or parsley to dress up the top, but I went all out on the flowers etc.
My son Zac just had his 23rd birthday. For his birthday dinner he requested some of his favorite Dutch oven dishes, Chicken Pot Pie, and Mushrooms & Asparagus (a family favorite). Since a couple of us are following the keto way of eating (avoiding carbs), I also made a Chicken, Bacon & Veggies dish that was keto friendly.
It had been a while since I’ve done a “DO Cook”, but I love cooking for my family and friends. I think somewhere in my history, I must have Italian blood, because I like to show my love through food.
It was fun cooking Zac’s favorites for him and his friends. Happy birthday Zacker!
Chicken Pot Pie
Mushrooms & Asparagus
For this version I modified the recipe to be more keto friendly.
I’m new to Quora, a website where people can ask any kind of question, and then people can post their helpful answers.
So today I was looking at some topics that I’m interested in, and the first Dutch Oven question I saw was “Is it Wise to Cook Bread in a Dutch Oven”. In some ways it kind of sounds like a funny question to me, but it’s really a valid question, and people just might not have the confidence, or experience to try it, so it is a genuine question.
So let me just tell you this – if you love good homemade bread, I have a simple answer for you… YES!! DO IT!!
I will link to my favorite recipe down below, meanwhile, read on and enjoy the eye candy…
I’m a big proponent of Dutch Oven cooking! As the saying goes – things always taste better from a Dutch Oven. And it’s true!
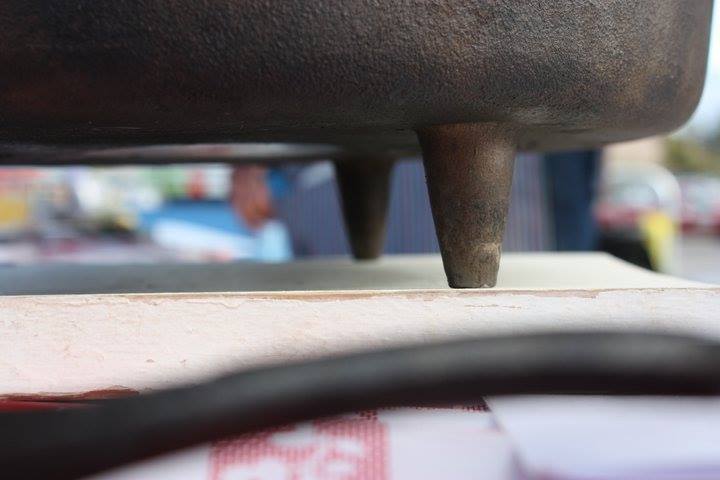
Most of my cast iron are Dutch Oven camp stoves (with the legs), and they are very versatile. I’ve used dutch ovens outdoors using charcoal, on the stovetop (carefully, because our stove is a glasstop), and in the oven.
Hey! Nice legs!!
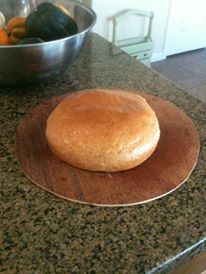
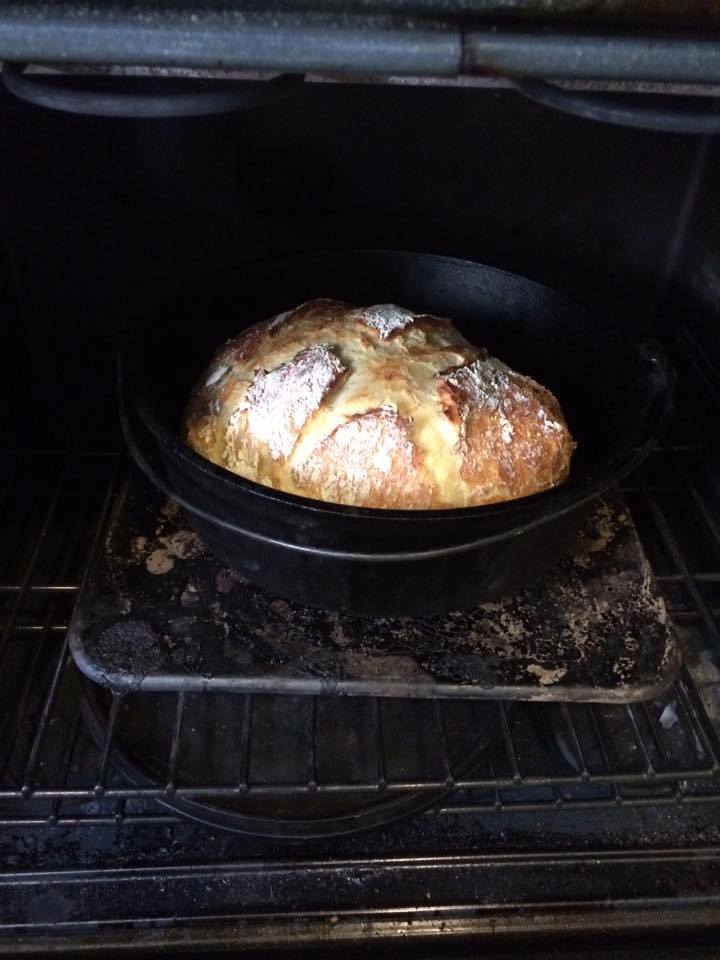
Below, is my enthusiastic evidence of why you absolutely should try cooking bread in a Dutch Oven.
This was my first loaf of bread in a Dutch Oven. It is a home-ground wheat bread that was cooked in a 10 in. DO using charcoals. I was really pleased with how it turned out. And it tasted great! (even though I’m not a huge fan of wheat bread)
Then it was quite a while before I attempted breads in a DO again. But then I discovered the No-Knead Bread. HOLY COW! So easy, so forgiving, so beautiful, and SO DELICIOUS!!
One of my first loaves of no-knead bread in a 12 in. Lodge Dutch Oven.
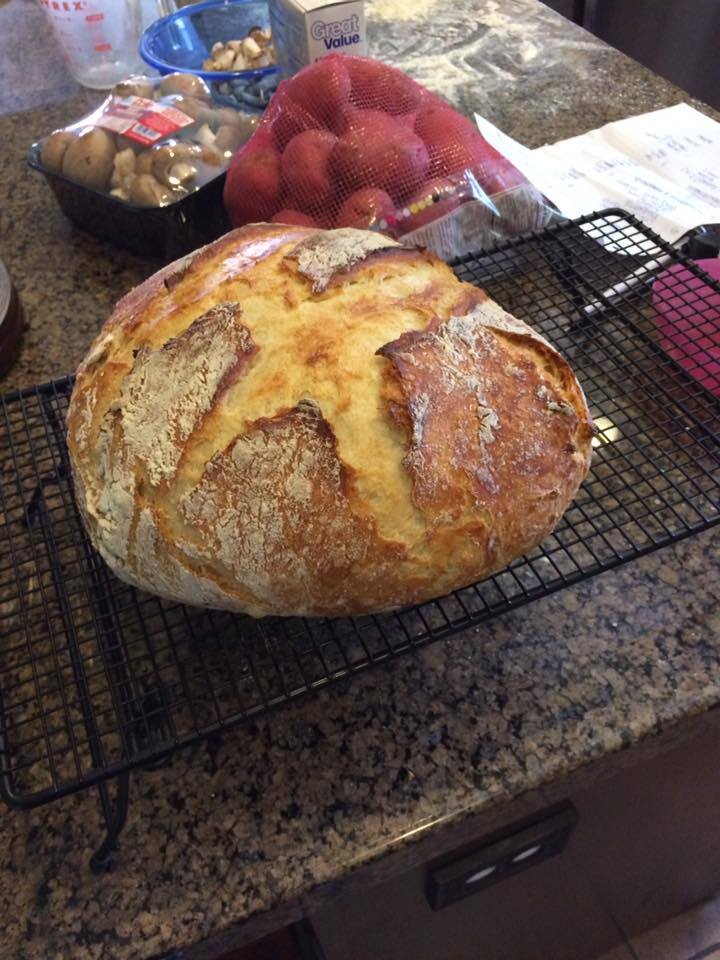
It quickly became a family favorite, as evidenced by a few pictures of this magical creation.
If only the computer had smell-a-vision!
Delicious and crusty – I never would have guessed how easy this bread would be to make.
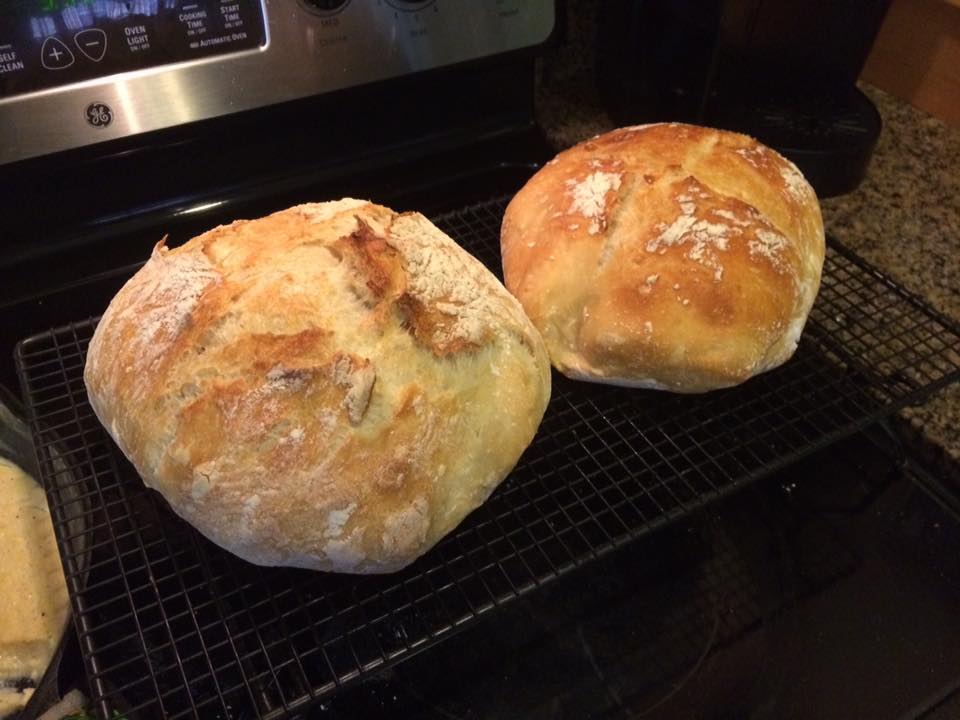
And when I say that it is a family favorite – let me tell you
One time I was cooking up some bread for a big family party. I was cooking outside using charcoals, and it was a bit windy that day. So in my efforts to compensate for the wind carrying the heat away too much (and admittedly, I was trying to hurry the process a little), I ended up burning the bottom of the bread a bit on some of the loaves.
I felt horrible! I wanted so badly have these perfect loaves for my family, but instead I had burnt bottoms! I thought nobody would like it. I felt like people were just being kind when they said they still liked it, but we ate a good amount of the bread. But I still thought they might just be being nice – that is until the end of the night and my niece hugged the remaining 1/2 loaf and eagerly asked if she could take the leftover bread home – burnt bottom and all.
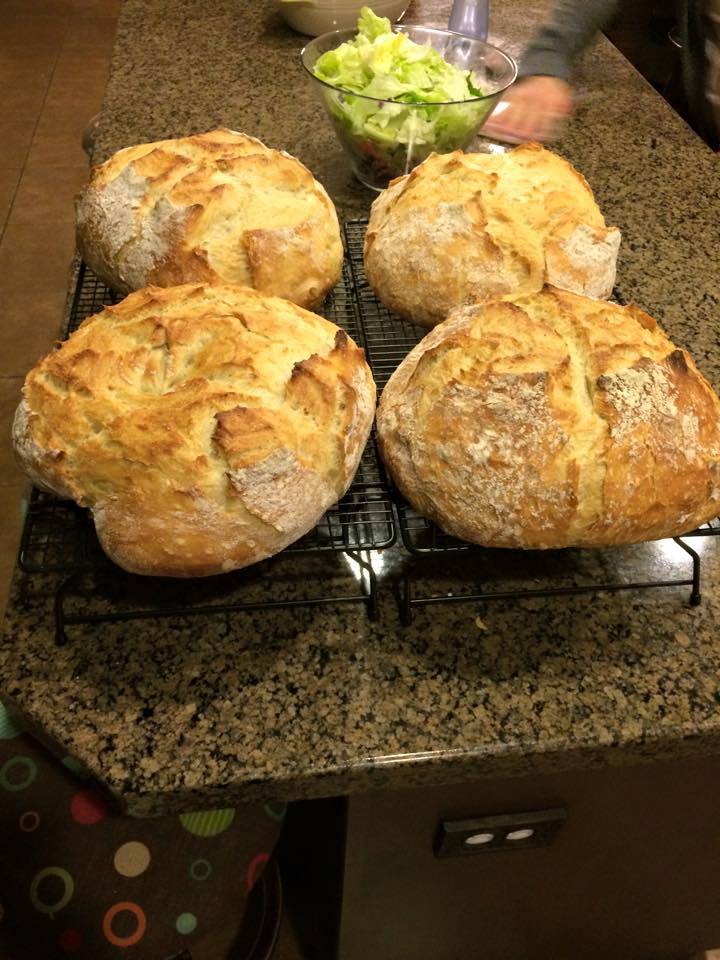
And when I say crusty, I mean CRUSTY – it has a good thick crust that can be hard to cut through. We bought an electric knife just for when we make this bread. Then you can cut it without destroying the slices. I highly recommend the electric knife. Four loaves of delicious No Knead Bread – Bring on the Honeybutter!! Give this Dutch Oven No-Knead Bread a Try!
Ok, before I send you to the recipe, here’s a couple notes.
For the recipe they give, I double it for each loaf.
The loaves shown here are the doubled recipe, and each cooked in a 12 in. Dutch Oven. They make a good family-sized loaf
You don’t need to use the baking paper. I used it the first time, but haven’t since. The only thing it really helps is lifting the bread out.
There are a lot of posts and pages about No-Knead Bread around the net, but here’s the page that I found at the time.
But it isn’t just limited to loaves of bread. Here are some other examples of breads that are great to cook in Dutch Ovens…
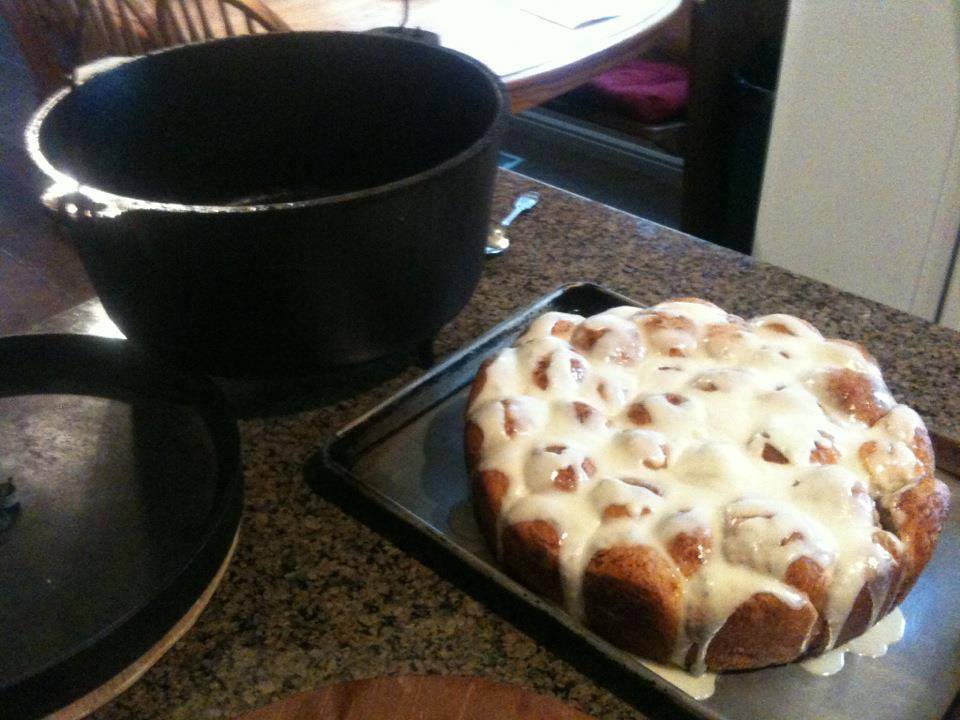
These Cinnamon Pull-Aparts are delicious, simple, and a family favorite. One co-worker said all she wanted for her birthday was for me to bring in a batch of these! I would set them up the night before and put the oven on a timer. Then in the morning I’d wake up to fresh, hot deliciousness. And keeping them in the DO, they were still warm when I got to work. Heaven!
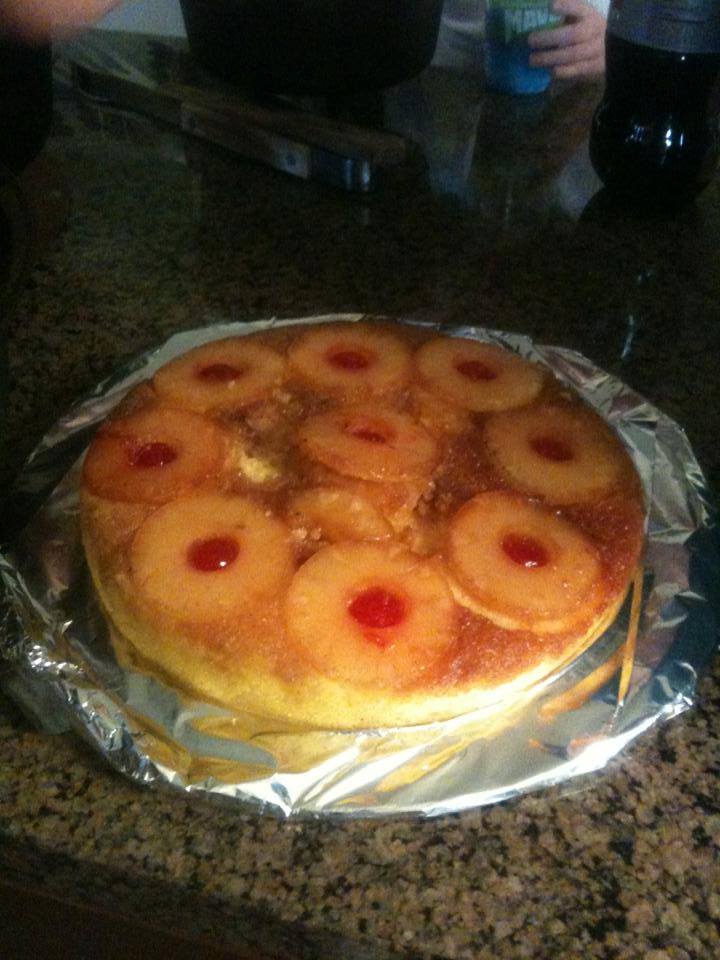
Dutch Oven Pineapple Upside-Down Cake – a Dutch Oven Standard! This is especially delicious when you bake it up the canyon during a picnic. Best tip for easy release from the pot – Cut a circle of parchment paper to fit the bottom of the dutch oven. Also, spray the pot with no-stick spray before every dish.
Don’t tell anyone that I cheat when I make this Dutch Oven Chicken Pot Pie! For the top I use buttery croissant dough from a tube! It’s a delicious little shortcut.
I found that the Dutch Oven Chicken Pot Pie was so easy and delicious, that I’ve made it a few different times.. The tomatoes and parsley make a nice garnish for the top of this Dutch Oven Chicken Pot Pie Or sometimes I’ve cut and twisted the croissant dough into ropes or flowers to garnish top of the Dutch Oven Chicken Pot Pie
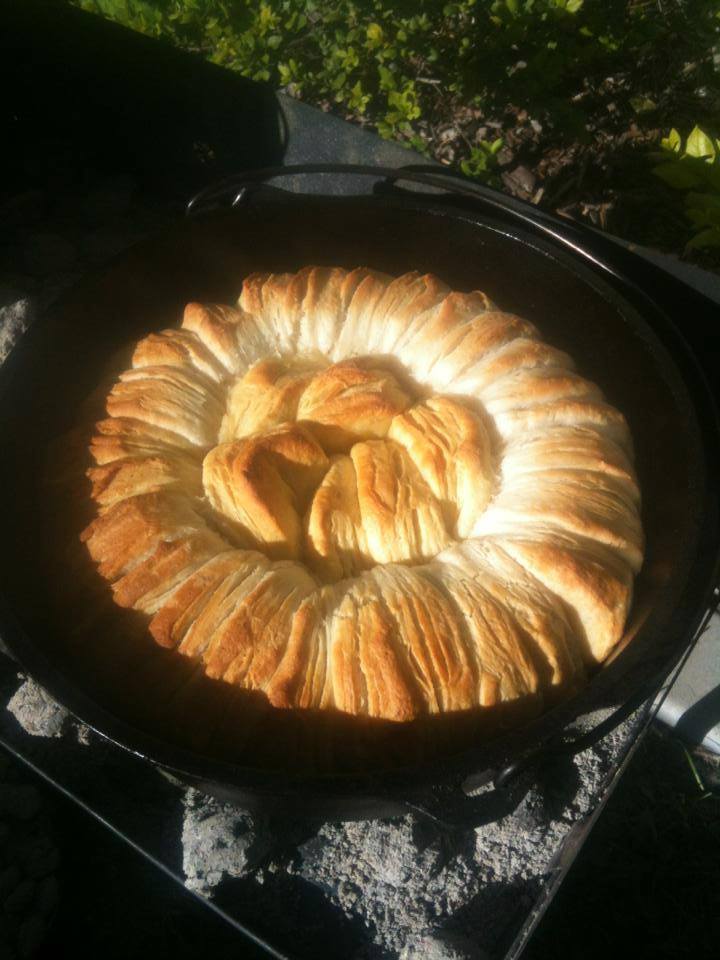
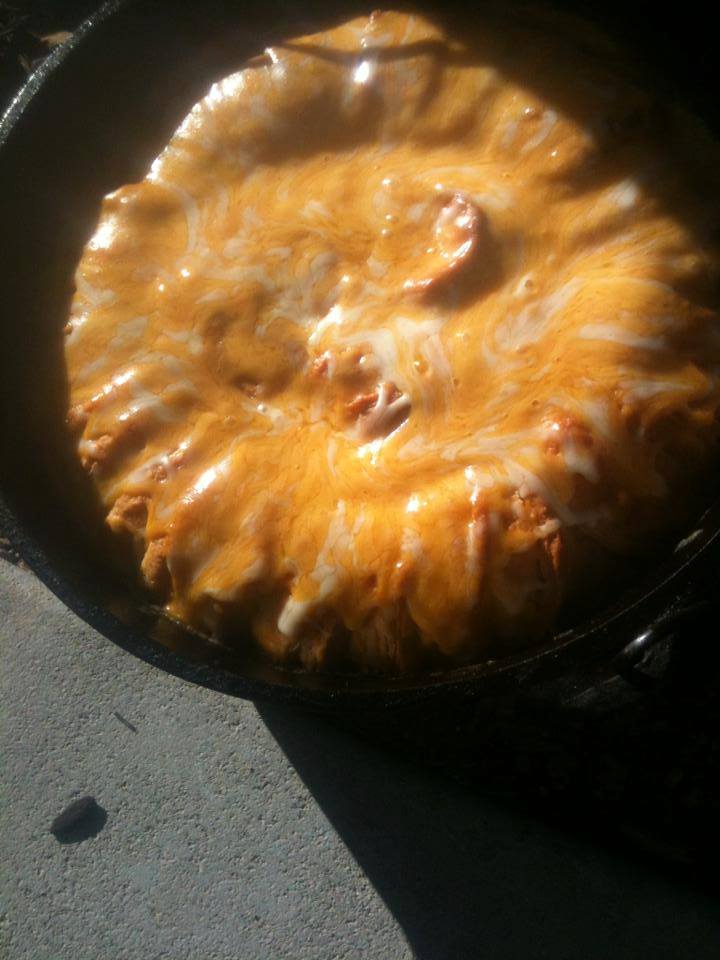
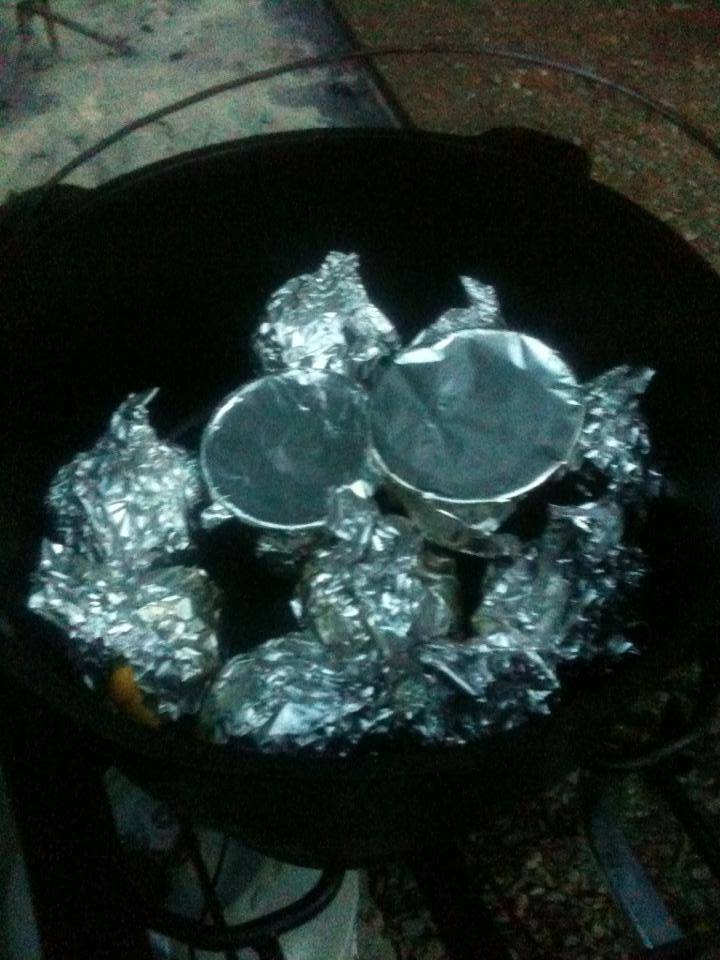
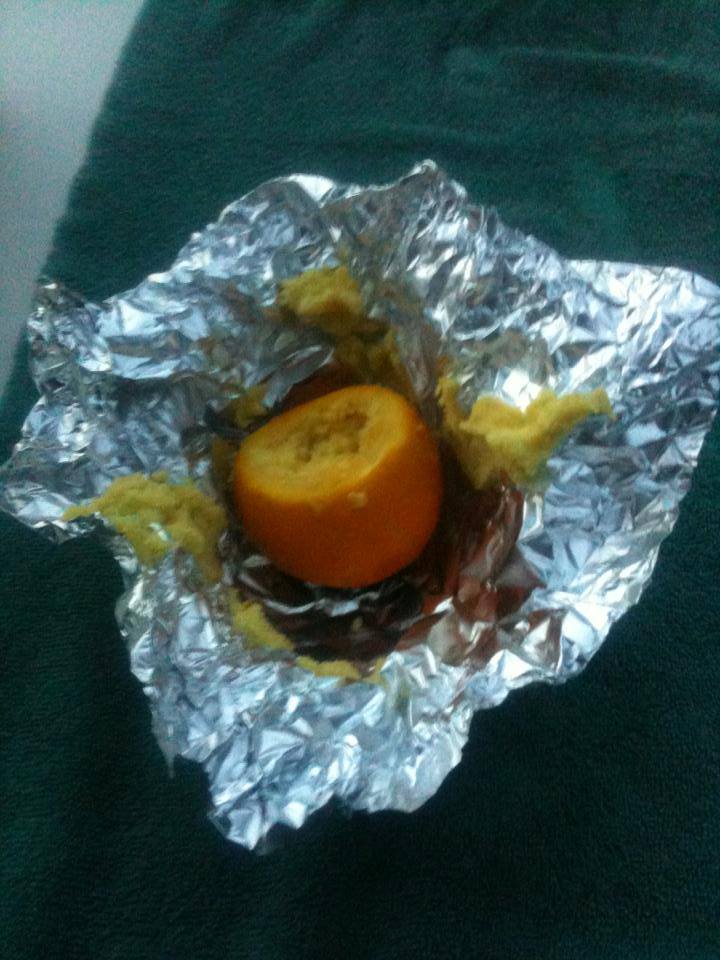
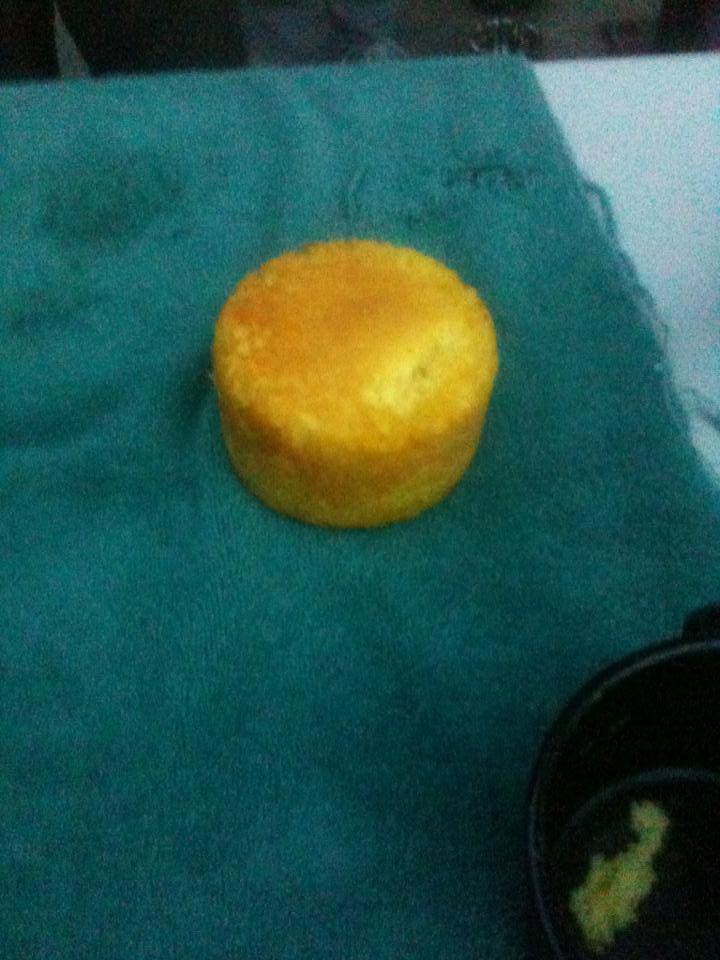
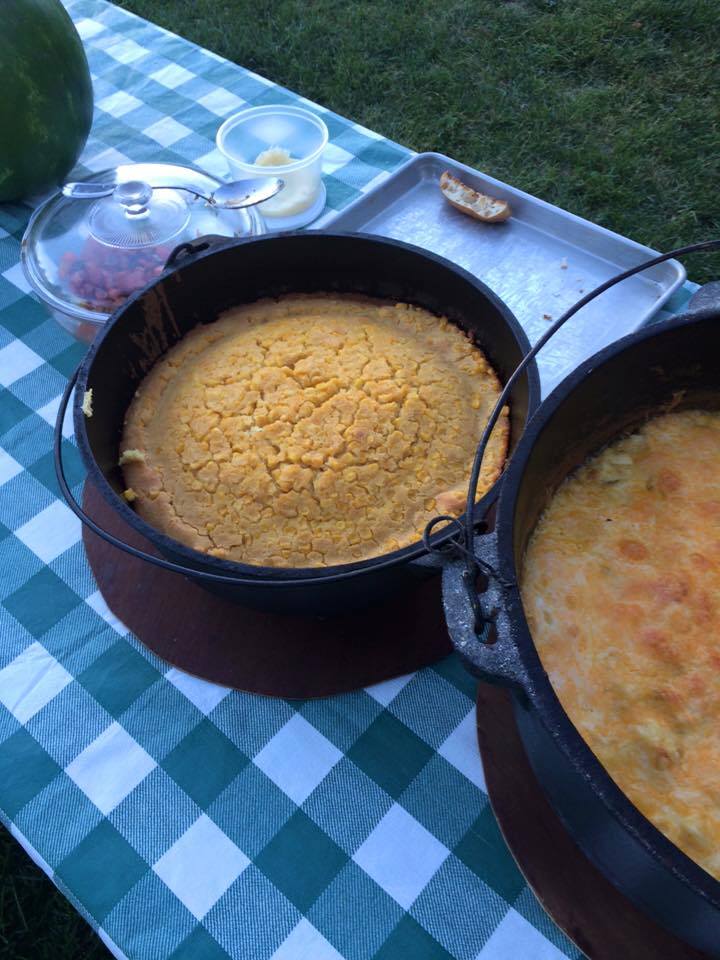
Poppin fresh biscuits in the Dutch Oven Mmmmm….. Dutch Oven Cheesy Biscuits! Mug Cakes cooked in the Dutch Oven while up camping Mug Cakes and Orange Cakes cooking in a 15 inch Dutch Oven One of the Orange Cakes cooked in the Dutch Oven These Mug Cakes were so easy, and fun to cook in a different way. Made for great camping food! And of course,…. Dutch Oven Cornbread! Yum!